Equipment Needed:
- A set of scales.
- A tape measure.
- A bowl/jug.
- Chalk or pegs and garden string (optional).
Why Calibrate?
As a spreader ages, its condition can affect the flow of fertiliser that passes through. Calibrating a spreader involves measuring the product output of a spreader over a specific area so that it can continue to be reliably used. Equally, when using a recently purchased spreader for the first time, a calibration is required to ensure the settings are set up correctly for your use.
There are two common types of spreader that used at home, drop spreaders and broadcast spreaders. A broadcast spreader has a rotating plate connected to the wheels which is driven round as you push the spreader along. This throws out the fertiliser in a circular pattern around the spreader which allows you to quickly cover a large area. For this reason, broadcast spreaders are better suited to larger gardens.
How To Calibrate a Spreader:
Step 1:
First you will need to work out your test area. Begin by using your tape measure to mark out a test area, we recommend using at least 10m2 initially. It’s best to use a tarmacked area if you can to avoid the risk of damaging your lawn and so you can easily sweep up the fertiliser once you have completed the test.
You could use the chalk pegs or garden string to mark out the area that you’re running the test. The more accurately you can determine the test area, the better results you are likely to achieve from your spreader.
Step 2:
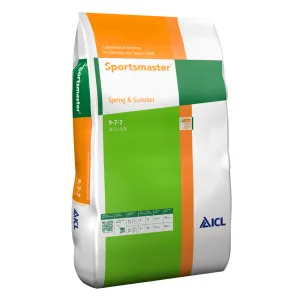
Next, you should weigh out the required amount of fertiliser using your scales and a bowl or jug as a container. For example, if your fertiliser recommends a spread rate of 35g/m2 (eg Nutrigrow 9-7-7) and your test area is 10m2, you will want to measure out 350g of fertiliser. We would suggest doubling this amount for the purpose of this test, however as this will make it easier to work out if you are distributing at too fast a rate. Put this fertiliser into the container, make sure the distribution holes are closed other wise the fertiliser will escape, and move the spreader to a couple of metres from the start point of the marked test area.
Step 3:
Begin walking at a normal pace pushing your spreader in front of you. Once you reach the start of the test area, open the distribution holes to the middle setting and continue to walk at the same pace. Move up and down the test area making sure to close the distribution holes when turning to avoid spreading too much fertiliser.
Step 4:
When you’ve covered the entire test area, you will need to check how much fertiliser you have left in your spreader. Scoop/pour the remaining product back into your measuring jug/bowl and weigh this on your scales. Next, by subtracting the amount of fertiliser you have left from what you began with, you can work out if you were spreading too fast, too slow, or just right. If your initial rate was wrong, rerun the test with a higher or lower distribution setting as required. Repeat this test until you achieve the correct spread rate and then make a note of this setting for future reference.


