A good log splitter can be a game-changer. This powerful tool transforms logs into manageable pieces, making firewood preparation and woodworking tasks much easier.
But what type of log splitter should you buy?
Before diving into how to use a log splitter, it’s worth understanding the different types available. There are primarily two types of log splitters: manual and powered. Choosing the right type for you will depend on the volume of wood you need to split, and your physical capabilities.
Manual log splitters
These are operated by hand and are ideal for smaller jobs or occasional use. They are often lighter and more portable but require more physical effort.
Powered Log Splitters
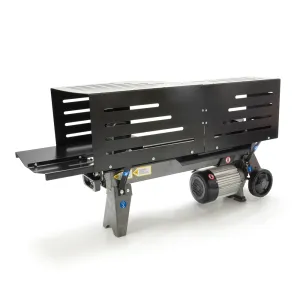
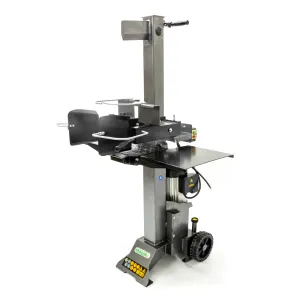
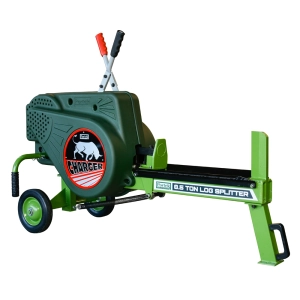
Available in both electric and petrol-powered models, these log splitters are more efficient for larger quantities of wood. They can split larger logs with ease, saving you the effort of swinging an axe, and often come with additional features. Agrigem sells electric powered log splitters.
Preparation
Before you start, it’s crucial to prepare both yourself and your equipment.
Always wear safety goggles or a face shield to protect your eyes from flying debris and wood chips. Choose sturdy gloves to protect your hands, and steel-toe-capped boots to safeguard your feet. A long-sleeved shirt and trousers can also help protect your skin from splinters.
Set up your log splitter on a flat, stable surface. Ensure the area is clear of any obstacles that could cause you to trip or interfere with the operation of the splitter.
Setting Up Your Log Splitter
Depending on whether you have a petrol or electric log splitter, the setup process will vary slightly, so always refer to your manufacturer’s specific instructions.
For electric splitters, ensure you have a suitable power source and that the cord is in good condition. Clear the work area and ensure it is free from obstacles. Keep pets and children away from your work area.
Many log splitters can operate in both horizontal and vertical positions. Horizontal splitters are generally easier to use for smaller logs, while vertical splitters are better for larger, heavier logs. Adjust the splitter to the position that best suits your needs.
Prepare your logs
You might be aiming for a beautiful display of equally sized split logs, but not all logs will split equally. Notice where the knots are - heavily knotted wood can be more challenging to split.
Inspect the logs for any embedded nails, screws, or other metal objects. These can damage the splitter and pose a safety hazard.
Hardwood logs like oak, maple, birch and alder will require more effort from your splitter, but softwoods like pine, ash or beech will be easier.
Ideally you should use logs that are the right size for your splitter, so check the maximum length and diameter capacities of your splitter before you buy one.
Finally, make sure your logs are dry or seasoned before splitting. Freshly cut or ‘green’ wood can be much harder to split.
Operating the Log Splitter
Now that you’re set up, it’s time to start splitting logs. Always stay focused and alert while operating the log splitter. Avoid distractions and never use the splitter if you are tired or under the influence of alcohol or medication that can impair your judgment.
Loading the log
Place the log onto the splitter bed. Make sure it is aligned with the grain, as this will make the splitting process easier and more efficient. If your splitter has a log cradle, use it to keep the log in place.
Splitting
Activate the hydraulic system by using the lever or control switch – making sure you’re following the manufacturer’s instructions carefully.
The hydraulic ram will push the log against the wedge, splitting it into two pieces. Keep your hands clear of the splitting area at all times.
Many log splitters require two-hand operation, which is a safety feature designed to keep your hands away from the moving parts.
Keep an eye on the log as it splits. If it doesn’t split easily, stop the machine and reposition the log or try a smaller log.
Don’t try and force the splitter if the log doesn’t want to cooperate. Some logs may have hidden knots. It is always best to discard a difficult log than try and force a split.
After Splitting
Once you’ve split the log, there are a few steps to follow to ensure everything is ready for the next use.
Carefully remove the split pieces and stack them neatly. Now you get to deploy your wood stacking skills and prepare them for optimal seasoning in a dry well-ventilated area!
Turn off the machine and disconnect it from the power source. Clean any debris from the splitter taking care to collect shavings and chips from the ground that may have sharp edges – especially important if you have pets.
Check for any maintenance needs, such as fluid levels or blade sharpness. Follow any additional instructions set out by your manufacturer before putting the splitter away.